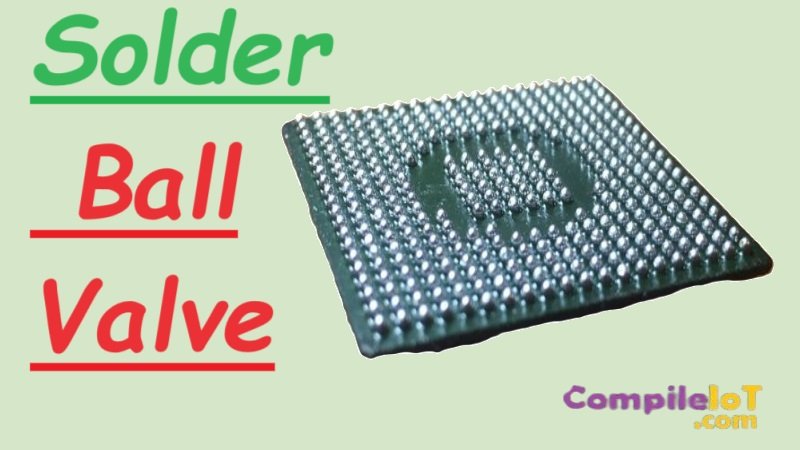
Solder Balls on a PCB
Ever noticed those tiny beads of solder in your gadgets? They’re called solder balls, and they’re pretty important for making sure things work right. But sometimes, they can cause problems like short circuits. Don’t worry though, we’re here to explain what solder balls are all about, why they’re important, and how to stop them from causing trouble in your devices. So, let’s take a closer look at solder balls and learn how they work!
What is a Solder Ball?
A solder ball is a small sphere of solder that forms during the soldering process. It is typically made of a tin-lead alloy or other solder materials. Solder balls are commonly used in electronics manufacturing to join components and create electrical connections on printed circuit boards (PCBs).
Causes of Solder Balls
There are several factors that can contribute to the formation of solder balls during the soldering process:
- Inadequate solder paste application: If the solder paste is not applied evenly or if too much solder paste is used, it can lead to the formation of solder balls.
- Incorrect reflow temperature: If the reflow temperature is too high or too low, it can cause the solder to ball up instead of properly melting and forming a smooth joint.
- Insufficient solder wetting: Poor wetting of the solder on the PCB pads or component leads can result in the formation of solder balls.
- Inadequate cleaning: If the PCB or components are not properly cleaned before soldering, contaminants can interfere with the soldering process and lead to the formation of solder balls.
Effects of Solder Ball on PCBs
Solder balls can have both positive and negative effects on PCBs, depending on their placement and characteristics. Let’s explore some of the effects:
1. Short Circuits : One of the most common negative effects of solder balls on PCBs is the potential for short circuits. When solder balls are not properly controlled and positioned, they can create unintended connections between adjacent conductive traces or components on the PCB. This can lead to malfunctioning circuits, damage to components, and even complete failure of the PCB.
2. Bridging : Solder balls can also cause bridging issues on PCBs. Bridging occurs when solder balls create unwanted connections between two or more conductive elements that are not intended to be electrically connected. This can disrupt the flow of current and lead to faulty operation of the PCB.
3. Insufficient Solder Joints: On the other hand, solder balls can also have positive effects when used properly. They can help create reliable and strong solder joints between components and the PCB. However, if the solder balls are too small or not properly distributed, they may result in insufficient solder joints. This can lead to weak connections, poor electrical conductivity, and potential failure of the PCB over time.
4. Thermal Stress: Solder balls can also contribute to thermal stress on PCBs. During the soldering process, the PCB and its components are subjected to high temperatures. If the solder balls are not properly melted and reflowed, or if there are inconsistencies in their distribution, it can lead to uneven heating and cooling of the PCB. This thermal stress can cause damage to the PCB, such as warping or delamination of the board.
5. Inspection and Rework Challenges: Solder balls can pose challenges during the inspection and rework processes of PCB assembly. If solder balls are present in areas where they shouldn’t be, it can make it difficult to visually inspect the PCB for quality control purposes. Additionally, if solder balls need to be removed or reworked, it requires careful handling and precise techniques to avoid further damage to the PCB or its components.
Preventing and Managing Solder Balls
To prevent the formation of solder balls and mitigate their effects, several measures can be taken during the soldering process:
- Optimize solder paste application: Ensure proper stencil design and alignment to achieve consistent and controlled solder paste deposition.
- Control reflow temperature: Use appropriate temperature profiles and ensure proper oven calibration to achieve optimal solder reflow without excessive heating.
- Ensure good solder wetting: Clean and prepare the PCB and components properly to promote good wetting and adhesion of the solder.
- Implement effective cleaning processes: Thoroughly clean the PCB and components to remove any flux residues or contaminants that can contribute to solder ball formation.
- Inspect and rework: Regularly inspect solder joints for the presence of solder balls and perform rework if necessary to remove them.
By following these best practices and taking necessary precautions, the occurrence of solder balls can be minimized, ensuring the reliability and performance of electronic assemblies.
How to Prevent Solder Balls?
Preventing solder balls is crucial for ensuring the reliability and functionality of electronic components. Here are some effective ways to prevent solder balls:
1. Proper Stencil Design and Solder Paste Application
To prevent solder balls, it is essential to have a well-designed stencil with appropriate aperture sizes and shapes. The stencil should allow for proper solder paste deposition without excess paste being deposited. Using a quality solder paste and ensuring proper temperature and humidity control during application can also help prevent solder balls.
2. Reflow Profile Optimization
The reflow profile refers to the temperature and time profile used during the soldering process. Optimizing the reflow profile can help prevent solder balls. It is important to ensure that the solder paste reaches its melting temperature and remains molten for the appropriate duration to allow for proper wetting and bonding. A well-optimized reflow profile can help minimize the formation of solder balls.
3. Component Placement and Alignment
Proper component placement and alignment are crucial for preventing solder balls. Components should be placed accurately and securely on the PCB (Printed Circuit Board) to ensure that the solder paste is distributed evenly during reflow. Misaligned or poorly placed components can lead to excess solder paste and the formation of solder balls.
4. Solder Mask Design
The solder mask is a protective layer applied to the PCB to prevent solder from flowing onto unintended areas. A well-designed solder mask with appropriate openings for component pads can help prevent solder balls. The solder mask should be properly aligned with the component pads to ensure that the solder paste is confined to the desired areas during reflow.
5. Inspection and Quality Control
Regular inspection and quality control measures are essential for preventing solder balls. Visual inspection, automated optical inspection (AOI), or X-ray inspection can help identify any solder ball formations or other soldering defects. By detecting and addressing any issues early on, proper corrective actions can be taken to prevent solder balls.
Solder Ball Valve
A solder ball valve is a type of valve that uses solder balls as the sealing mechanism. It is commonly used in plumbing and heating systems to control the flow of liquids or gases. The solder balls, usually made of brass or other metals, are housed within the valve body and are manipulated to open or close the flow passage.
Solder ball valves are popular due to their reliability, durability and ease of installation. They are typically used in applications where a tight shut-off is required, such as in residential and commercial plumbing systems, heating systems and industrial processes.
When the solder ball valve is in the closed position, the solder balls are pressed against the valve seat, creating a watertight seal. When the valve is opened, the solder balls are lifted away from the seat, allowing the flow of fluid or gas through the valve.
Installation of a solder ball valve is relatively straightforward. The valve is typically soldered onto the pipe using a torch and soldering material. It is important to ensure proper alignment and a secure bond between the valve and the pipe to prevent leaks.
Regular maintenance and inspection of solder ball valves are essential to ensure their proper functioning. This includes checking for any signs of corrosion, leaks, or wear and tear. If any issues are detected, it is recommended to replace the valve or seek professional assistance for repairs.
What Makes Solder Ball During Hand Soldering?
There are several reasons why solder balls can appear during hand soldering. Firstly, using too much solder can lead to the formation of these small balls. When an excess amount of solder is applied, it can pool up and solidify into spherical shapes. Additionally, uneven heating during the soldering process can contribute to solder ball formation. If the heat isn’t evenly distributed or if the soldering iron isn’t at the right temperature, certain areas may become hotter than others, causing the solder to melt unevenly and form into balls.
Another factor is the insufficient application of flux, which is a substance that helps clean surfaces and promotes proper solder adhesion. If there isn’t enough flux, the solder may not stick well, resulting in the formation of solder balls. Moreover, if the surfaces being soldered are dirty or contaminated with grease or oxidation. it can hinder the smooth flow of solder and lead to the formation of solder balls. Lastly, using incorrect soldering techniques, such as holding the soldering iron at the wrong angle or applying too much pressure, can cause the solder to accumulate and form into balls.
How to Prevent Solder Ball Formation?
To prevent solder ball formation during hand soldering, consider the following tips:
1. Use the Right Amount of Solder
Ensure that you are using the correct amount of solder for each joint or component. Avoid applying excessive solder, as this increases the likelihood of solder ball formation.
2. Heat Evenly
Ensure that the heat source is evenly distributed and that the soldering iron is properly heated. This will help to ensure that the solder melts evenly and reduces the chances of solder ball formation.
3. Apply Sufficient Flux
Apply an adequate amount of flux to the joint or component. The flux helps to clean the surfaces and promote proper wetting, reducing the formation of solder balls.
4. Clean and Prepare Surfaces
Before soldering, make sure to clean and prepare the surfaces properly. Remove any dirt, grease, or oxidation that may hinder the flow of solder and contribute to solder ball formation.
5. Use Proper Soldering Technique
Practice good soldering technique, including holding the soldering iron at the correct angle and applying the right amount of pressure. This will help to ensure that the solder flows smoothly and minimizes the chances of solder ball formation.