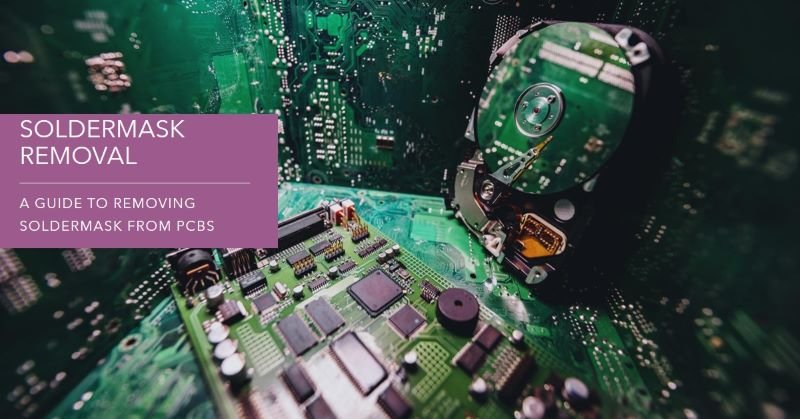
How to Remove Soldermask from Printed Circuit Boards?
The primary purpose of the soldermask is to prevent accidental solder bridging, protect the copper from oxidation, and reduce the risk of short circuits by insulating the conductive traces. Despite its importance, there are situations where removing the soldermask becomes necessary. Whether it’s for making repairs, modifying the PCB layout, or reworking a design, removing the soldermask allows for direct access to the copper traces. This can be critical for adding new components, fixing damaged areas, or altering circuit paths.
Understanding the proper techniques for soldermask removal is essential to ensure that the underlying PCB is not damaged during the process.
Safety Precautions
Removing soldermask from a PCB involves the use of tools and chemicals that can be hazardous if not handled properly. Ensuring safety should be your top priority.
- Wearing Protective Gear: Always wear protective gloves and goggles to shield your hands and eyes from harmful chemicals and sharp tools. Gloves protect your skin from corrosive substances, while goggles prevent any splashes from reaching your eyes.
- Ensuring Proper Ventilation: Many of the chemicals used in soldermask removal emit fumes that can be harmful when inhaled. Always work in a well-ventilated area or use a fume extractor to ensure that you are not exposed to dangerous fumes.
- Handling Chemicals and Tools with Care: Chemicals like acetone and soldermask removers are highly flammable and can cause skin irritation. Handle them with caution, following the manufacturer’s instructions for use and disposal. Similarly, tools like scalpels or scrapers should be used with precision to avoid injury and prevent damage to the PCB.
Tools and Materials Needed
For effective soldermask removal, you’ll need a set of specialized tools and materials. Here’s a list of what you’ll need:
- Essential Tools:
- Scalpel: For precise scraping of the soldermask.
- Scraper: A broader tool for removing larger areas of soldermask.
- Fiberglass Brush: Useful for gentle abrasion and removal of the soldermask in confined spaces.
- Tweezers: For handling small components and materials during the process.
- Chemicals:
- Acetone: A common solvent that can dissolve the soldermask.
- Soldermask Remover: Specialized chemical designed to break down the soldermask without harming the PCB.
- Isopropyl Alcohol (IPA): For cleaning the PCB after soldermask removal.
- Safety Equipment:
- Protective Gloves: To protect your skin from chemicals and abrasions.
- Safety Goggles: To protect your eyes from chemical splashes and debris.
- Fume Extractor: To remove harmful fumes from your workspace.
Methods to Remove Soldermask
a. Mechanical Method
The mechanical method involves physically scraping off the soldermask using tools like scalpels, scrapers, or fiberglass brushes.
- Detailed Steps:
- Preparation: Secure the PCB on a stable surface to prevent movement during the process.
- Tool Selection: Choose a scalpel or scraper based on the area and precision required.
- Scraping: Gently scrape the soldermask away, starting from one edge and working your way across the area you need to expose. Use light pressure to avoid gouging the copper traces.
- Finishing: Once the soldermask is removed, clean the area with isopropyl alcohol to remove any debris.
- Pros and Cons:
- Pros:
- Precise control over the area being worked on.
- No need for chemicals, reducing the risk of chemical exposure.
- Cons:
- Time-consuming, especially for larger areas.
- Risk of damaging the copper traces if not done carefully.
- Pros:
b. Chemical Method
The chemical method uses solvents to dissolve the soldermask, allowing for its easy removal.
- Step-by-Step Guide:
- Preparation: Place the PCB in a well-ventilated area and secure it on a stable surface.
- Apply the Solvent: Using a cotton swab or brush, apply the acetone or soldermask remover to the area where the soldermask needs to be removed. Ensure even coverage.
- Wait: Allow the chemical to work for the recommended time, usually a few minutes, to break down the soldermask.
- Remove the Soldermask: Use a scraper or brush to gently remove the softened soldermask. Reapply the solvent if necessary.
- Clean the Area: After removing the soldermask, clean the PCB with isopropyl alcohol to remove any remaining residue.
- Pros and Cons:
- Pros:
- Faster and easier for larger areas.
- Less physical effort required compared to mechanical methods.
- Cons:
- Requires careful handling of chemicals, which can be hazardous.
- Potential risk of damaging the PCB if the solvent is too strong or left on too long.
- Pros:
c. Combination of Methods
In some cases, using a combination of mechanical and chemical methods can provide the best results.
- When and Why to Use a Combination:
- If the soldermask is particularly stubborn or if a large area needs to be removed, starting with a chemical method to soften the soldermask, followed by mechanical scraping, can be effective.
- This approach can minimize the risk of damage while ensuring thorough removal.
- Step-by-Step Instructions:
- Chemical Application: Start by applying a solvent to soften the soldermask as described in the chemical method.
- Mechanical Scraping: Once the soldermask is softened, use a scalpel or scraper to remove it. The softened material should come off more easily, reducing the risk of damaging the PCB.
- Final Cleanup: Clean the PCB with isopropyl alcohol to ensure all residues are removed.
Using the combination method provides a balance of efficiency and precision, making it a versatile approach for soldermask removal.
Precautions While Removing Soldermask
Removing soldermask from a PCB requires precision and care to avoid unintentional damage. Here are some key precautions to take during the process:
- Tips on Avoiding Damage to PCB Traces and Pads:
- Apply Gentle Pressure: When using mechanical tools like scalpels or scrapers, apply only light pressure. Excessive force can gouge or lift the delicate copper traces, leading to permanent damage.
- Use Proper Tools: Ensure you are using the correct tools for the job. A sharp scalpel or a fine fiberglass brush provides better control and reduces the risk of accidental damage.
- Work Slowly and Methodically: Rushing the process can lead to mistakes. Take your time, especially around complex or densely populated areas of the PCB, to avoid cutting into traces or pads.
- How to Protect Sensitive Components During the Process:
- Shield Components: If working near sensitive components, consider using a protective shield or tape to cover them. This prevents accidental damage from tools or chemicals.
- Avoid Excessive Heat: If using heat during the process (e.g., to soften the soldermask), be cautious not to apply it for too long, as excessive heat can damage components or cause solder joints to melt.
- Isolate the Area: When using chemicals, apply them only to the area where the soldermask needs to be removed. Use a fine brush or swab to control the application and avoid spilling onto other parts of the PCB.
- Common Mistakes to Avoid:
- Using the Wrong Solvent: Not all solvents are suitable for soldermask removal. Using the wrong one can damage the PCB material or leave residues that are difficult to clean.
- Over-Scraping: Scraping too aggressively can remove not only the soldermask but also the copper traces underneath. Always start with gentle pressure and gradually increase if necessary.
- Inadequate Ventilation: Failing to work in a well-ventilated area when using chemicals can expose you to harmful fumes, leading to health risks. Always ensure proper ventilation.
Post-Removal Cleanup
After successfully removing the soldermask, it’s crucial to clean and inspect the PCB to ensure it’s ready for further use or repairs.
- How to Clean the PCB After Removing the Soldermask:
- Use Isopropyl Alcohol (IPA): Apply isopropyl alcohol to a clean cloth or swab and gently wipe the area where the soldermask was removed. This helps to remove any residual chemicals, dust, or debris.
- Brush Off Loose Particles: Use a soft brush to gently remove any loose particles from the PCB. Be careful not to apply too much pressure that could dislodge components or damage traces.
- Dry Thoroughly: Ensure the PCB is completely dry before proceeding with any further work. You can air dry it or use a compressed air canister to blow away any moisture.
- Checking the PCB for Any Residues or Damage:
- Inspect Under Magnification: Use a magnifying glass or microscope to inspect the area where the soldermask was removed. Look for any remaining residues or signs of damage to the copper traces or pads.
- Test for Continuity: Use a multimeter to check the continuity of the exposed traces to ensure they haven’t been cut or damaged during the process.
- Proper Disposal of Used Chemicals and Materials:
- Follow Local Regulations: Dispose of any used chemicals like acetone or soldermask remover according to local regulations. Never pour them down the drain as they can be harmful to the environment.
- Use Appropriate Containers: Store any waste materials in labeled, sealed containers until they can be properly disposed of at a hazardous waste facility.
- Clean Tools: After use, clean your tools with isopropyl alcohol or another appropriate cleaner to remove any chemical residues. Store them in a dry, safe place.
Applications of Soldermask Removal
There are several scenarios where removing soldermask from a PCB is not only beneficial but necessary:
- Scenarios Where Removing Soldermask is Beneficial:
- Circuit Repair: When a trace is damaged or broken, removing the soldermask allows for direct access to the copper, making it possible to apply solder and repair the connection.
- Adding New Components: In cases where new components need to be added to a PCB, removing the soldermask from specific areas can provide additional solder points or allow for modifications to the circuit layout.
- Reworking PCBs: For prototypes or custom modifications, removing the soldermask may be necessary to reconfigure connections or bypass certain circuit paths.
- Examples of Successful Projects Requiring Soldermask Removal:
- Repairing a Broken Trace: A technician successfully removed the soldermask to expose a broken trace, applied a thin wire to bridge the gap, and restored the functionality of a critical circuit in an industrial controller.
- Modifying a PCB for Custom Lighting: An electronics hobbyist removed the soldermask to add additional LEDs to a custom PCB, creating a unique lighting effect for a DIY project.
- Upgrading Components on a Legacy PCB: An engineer removed the soldermask to add modern components to an older PCB design, extending the life of the device.
Conclusion
Removing soldermask from a PCB is a delicate process that requires careful handling of tools and chemicals to avoid damaging the board. By following the right methods—whether mechanical, chemical, or a combination of both—you can safely and effectively expose the copper traces needed for repairs, modifications, or rework.
Remember, safety is paramount. Always wear protective gear, work in a well-ventilated area, and handle chemicals with care. Taking the time to follow these guidelines ensures that your PCB remains intact and functional, ready for the next stage of your project.
FAQs
Q: Is it possible to remove the soldermask without damaging the copper traces?
Yes, by using gentle scraping techniques or applying the right chemicals, you can remove the soldermask without harming the copper underneath. It’s important to work slowly and use the appropriate tools for the job.
Q: What is the best solvent for removing soldermask?
Acetone and specialized soldermask removers are commonly used solvents. However, the best choice depends on the specific type of soldermask and the PCB material. Always test a small area first to ensure compatibility.
Q: Can I use heat to remove soldermask?
Heat can sometimes be used to soften the soldermask, making it easier to scrape off. However, excessive heat can damage the PCB or cause solder joints to melt, so it should be used with caution.
Q: How can I deal with stubborn soldermask that won’t come off?
If the soldermask is resistant to removal, try applying a combination of chemical and mechanical methods. Start with a solvent to soften the soldermask, then use a scalpel or scraper to gently remove it.
Q: Is it safe to remove soldermask near sensitive components?
Yes, but you must take extra precautions. Shield sensitive components from chemicals and be careful not to apply too much pressure when working near them. Using a fine brush or swab can help control the process in delicate areas.