Servo Motor Interfacing on Raspberry Pi Pico W: Arduino IDE Guide
In this tutorial, we’ll explore how to interface a servo motor with the Raspberry Pi Pico W using the Arduino IDE. While MicroPython is commonly used for programming the Pico W, this guide will focus on utilizing C/C++ for those who prefer this language. The Raspberry Pi Pico W is an affordable and powerful microcontroller that offers great versatility for various projects.
Why Use Arduino IDE?
The Arduino IDE is a popular choice for many beginners and experienced programmers alike due to its simplicity and extensive library support. It allows for quick and easy development without the need for additional software installations. Using Arduino IDE, you can leverage a vast ecosystem of libraries to control various hardware components, including servo motors.
Components Required
To get started, you’ll need the following components:
- Servo Motor (SG-90)
- Raspberry Pi Pico W Board
- Jumper Wires & Breadboard
Understanding the Raspberry Pi Pico W
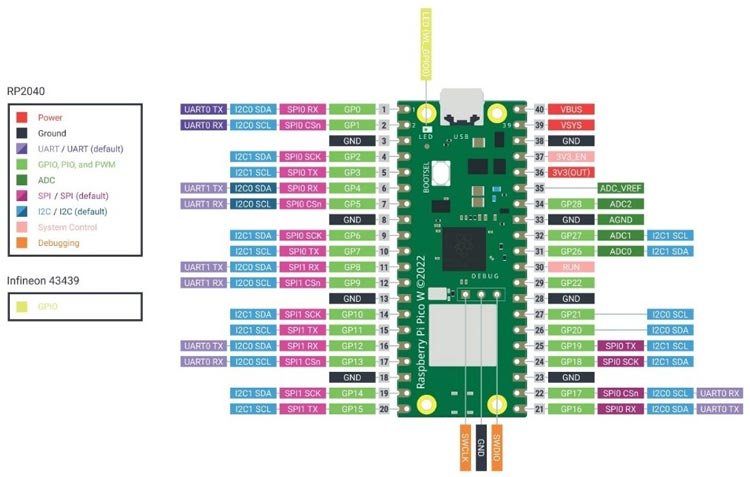
The Raspberry Pi Pico W features an RP2040 microcontroller with built-in Wi-Fi and Bluetooth, making it ideal for IoT projects. It has 26 GPIO pins, 264kB of SRAM, and 2MB of onboard flash memory. These GPIO pins include power, ground, and reference pins.
How a Servo Motor (SG-90) Works
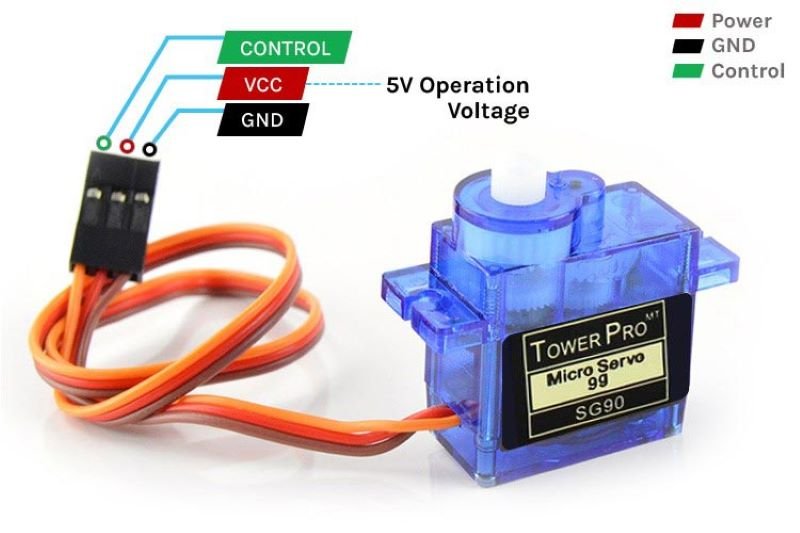
The SG-90 servo motor is a popular choice for precise angular motion control, offering a range of 0 to 180 degrees. It operates using Pulse Width Modulation (PWM), where the position of the servo is determined by the duty cycle of the PWM signal.
Servo Motor Connections:
- VCC: Connects to the positive terminal of the power supply (4.8V to 6V).
- GND: Connects to the ground of the power supply.
- Signal: Connects to a PWM-enabled GPIO pin on the Pico W, which controls the servo’s position.
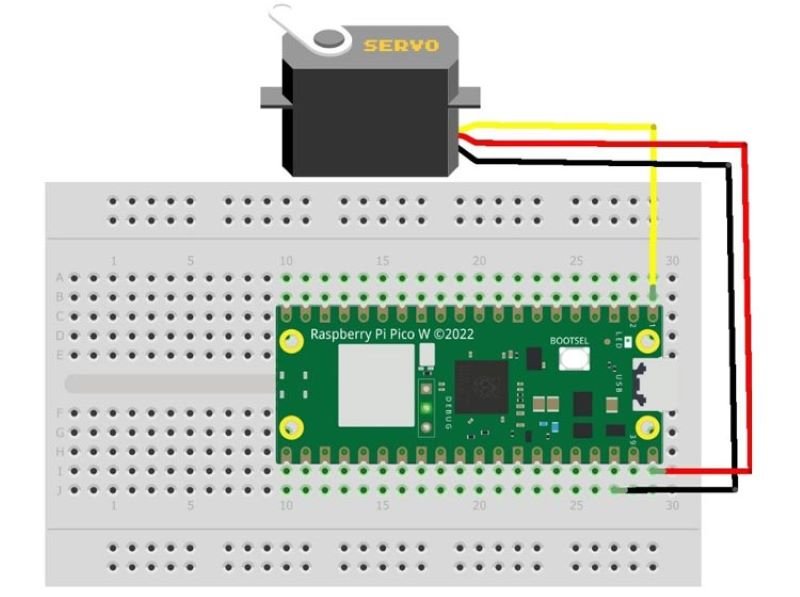
Circuit Diagram
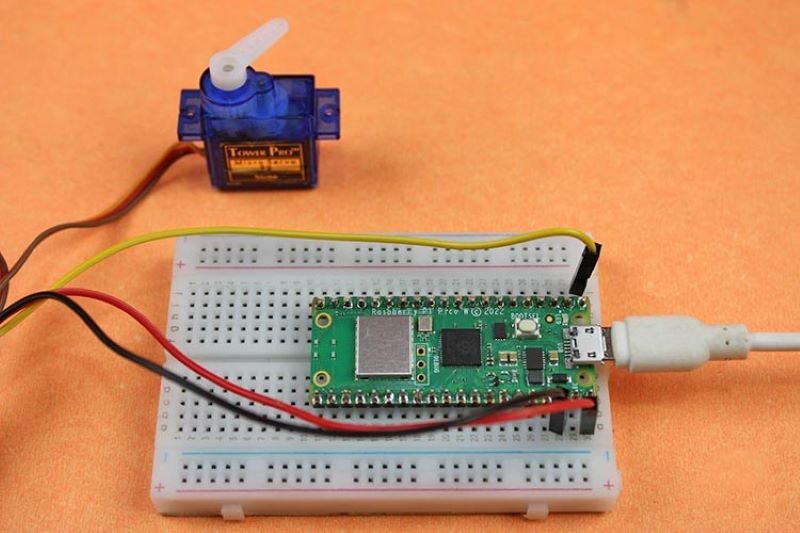
To interface the servo with the Raspberry Pi Pico W, follow these connections:
- Connect the VCC pin of the servo to the VBUS pin of the Pico W.
- Connect the GND pin of the servo to a ground pin on the Pico W.
- Connect the Signal pin of the servo to a PWM-enabled GPIO pin on the Pico W, such as GPO.
Arduino Code for Interfacing Servo with Raspberry Pi Pico W
Here’s the code to control the servo motor using the Arduino IDE:
#include <Servo.h>
#define PIN_SG90 0 // Output pin used
Servo myservo; // create servo object to control a servo
void setup() {
myservo.attach(PIN_SG90, 400, 2600); // Minimum and maximum pulse width (in µs) to go from 0° to 180°.
}
void loop() {
// Rotation from 0 to 180°.
for (int Angle = 0; Angle <= 180; Angle += 1) {
myservo.write(Angle);
delay(10);
}
// Rotation from 180° to 0.
for (int Angle = 180; Angle >= 0; Angle -= 1) {
myservo.write(Angle);
delay(10);
}
}
Explanation
- Setup Function: The
setup()function attaches the servo to the specified GPIO pin and defines the pulse width range for 0° to 180° rotation. - Loop Function: The
loop()function uses twoforloops to rotate the servo from 0° to 180° and back to 0°, with a delay of 10 milliseconds between each step.
Uploading Code to Raspberry Pi Pico W
To upload the code to the Raspberry Pi Pico W, ensure you have the appropriate board library installed in the Arduino IDE. Follow the step-by-step installation procedures available in the tutorials for setting up your development environment. Once set up, upload the code and verify the connections to ensure proper operation of the servo motor.
Summary
Interfacing a servo motor with the Raspberry Pi Pico W using Arduino IDE is a straightforward process that combines the power and versatility of the Pico W with the user-friendly environment of Arduino IDE. By following the steps outlined in this tutorial, you can easily control the angular position of a servo motor, making it suitable for a wide range of applications such as robotics, RC vehicles, and automation systems.
The Raspberry Pi Pico W, with its built-in Wi-Fi and Bluetooth capabilities, expands the potential for creating connected and IoT-enabled projects. Leveraging the rich library ecosystem and the simplicity of the Arduino IDE, even beginners can quickly get started with programming and hardware interfacing.
We hope you found this guide useful and informative. Feel free to leave any questions or comments below.